Homemade Freezer Burritos: Easy, Budget-Friendly, Better Than Store-Bought
In the whirlwind of modern life, finding time for healthy, delicious meals can feel like a Herculean task. Between work, family, and a myriad of other commitments, it's easy to fall back on takeout or processed foods. But what if there was a secret weapon, a culinary marvel that promised homemade goodness, incredible convenience, and significant savings, all tucked neatly into your freezer? Enter homemade freezer burritos – a true game-changer for anyone looking to eat better, save money, and reclaim precious time.
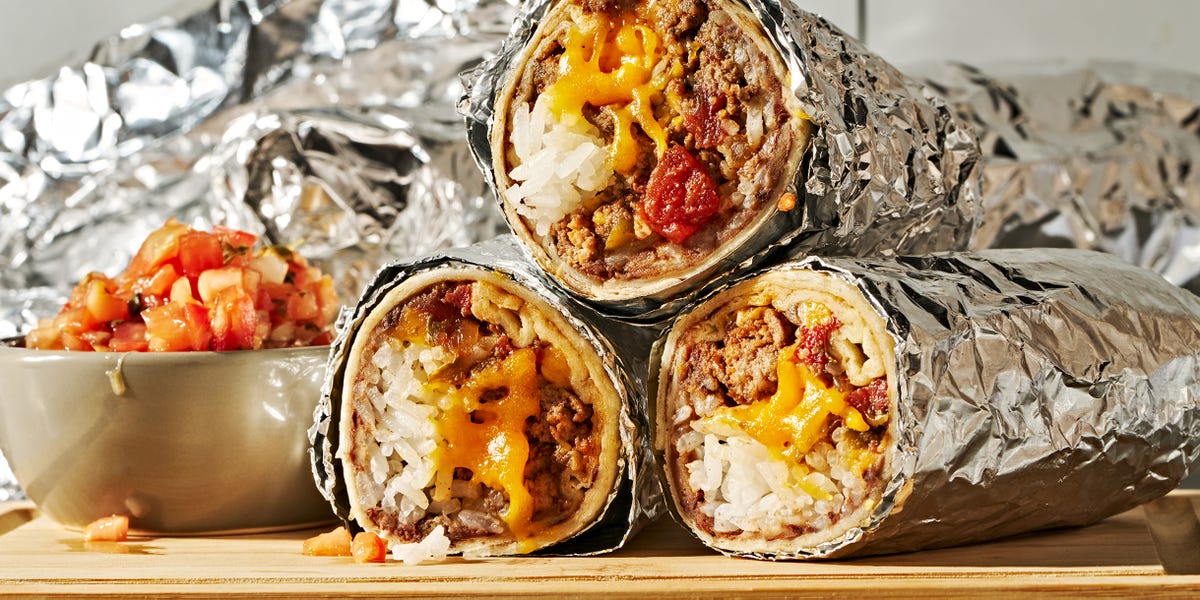
Forget the cardboard-tasting, mystery-meat versions from the grocery store freezer aisle. These aren't just any frozen burritos; they're thoughtfully crafted, packed with ingredients you recognize, and bursting with flavor. Imagine having a wholesome, satisfying meal ready in minutes, whether it's a quick lunch at your desk, an after-school snack for the kids, or a stress-free weeknight dinner. That's the power of a well-stocked stash of homemade freezer burritos. They are the epitome of practical, delicious, and budget-conscious meal prep, promising to make your future self incredibly happy.
Why Homemade Freezer Burritos Are a Game-Changer for Meal Prep
The appeal of homemade freezer burritos extends far beyond their convenience. They embody a holistic approach to eating well in a busy world, tackling several common challenges with one ingenious solution. Firstly, let's talk about the health aspect. When you make your own burritos, you're in complete control of the ingredients. This means choosing lean proteins like ground turkey or extra-lean ground beef, ensuring high-quality refried beans, and opting for whole-grain or high-fiber tortillas. Unlike many store-bought options that are often loaded with sodium, unhealthy fats, and preservatives, your homemade versions are clean, nutritious, and tailored to your dietary preferences.
Secondly, the economic benefits are undeniable. Purchasing individual frozen meals or relying on takeout adds up quickly. By buying ingredients in bulk and preparing a large batch of burritos at once, you dramatically reduce your per-meal cost. This budget-friendly approach doesn't just save money; it also encourages mindful consumption and reduces food waste by utilizing ingredients you already have on hand. It's an investment of a couple of hours now for weeks of effortless, affordable meals later.
Finally, the sheer practicality of having healthy meals on standby cannot be overstated. From impromptu hunger pangs to evenings when cooking feels like an impossible feat, these burritos are your reliable fallback. They eliminate the "what's for dinner?" dilemma and the temptation to order expensive delivery. They're perfect for meal prepping to save time and stress, ensuring that even on your busiest days, a warm, homemade meal is never more than a few minutes away.
Crafting Your Perfect Freezer Burrito: Ingredients & Customization
The beauty of homemade freezer burritos lies in their incredible versatility. While there's a foundational formula that works beautifully, the possibilities for customization are endless, allowing you to create burritos that perfectly match your taste and nutritional goals.
The Core Fillings
At the heart of a great burrito are robust, flavorful fillings. Start with your protein – lean ground turkey or extra-lean ground beef are excellent choices, providing a substantial source of protein without excessive fat. Seasoning is key here; think taco seasoning, chili powder, cumin, and garlic powder to build a deep, savory base. One fantastic tip from experienced meal preppers is to add a dollop of plain Greek yogurt and a splash of enchilada sauce to your cooked meat. This combination creates a wonderfully creamy, flavorful sauce that keeps the filling moist and delicious, even after freezing and reheating.
Next up, beans. Refried beans are a classic choice, offering a creamy texture, additional protein, and a significant fiber boost. You can opt for traditional refried beans or go for a black bean and corn salsa for a different flavor profile. A modest layer of shredded cheese (cheddar, Monterey Jack, or a Mexican blend) adds an extra layer of flavor and helps bind the ingredients together.
The Tortilla Matters
The tortilla isn't just a wrapper; it's an integral part of the burrito experience. For freezer burritos, you'll want large (10-12 inch) flour tortillas that are sturdy enough to hold your fillings without tearing. The good news is that modern tortillas offer more than just structure. Many brands now provide high-fiber and even high-protein options that are soft, pliable, and taste fantastic. Brands like Mission, Xtreme Wellness, and La Banderita are widely available and perform excellently. These improved tortillas not only boost the nutritional profile of your burrito but also hold up beautifully to freezing and reheating, even crisping up nicely if you choose to pan-fry them later.
Beyond the Basics: Customization Ideas
Once you've mastered the core, feel free to get creative. Consider adding cooked rice (brown or white), sautéed bell peppers and onions, corn, or even a handful of fresh spinach for extra veggies. For those aiming for specific macros, these burritos can be easily adjusted; for example, adding more lean meat and opting for high-protein tortillas can turn your meal into a protein-packed powerhouse, ideal for fitness enthusiasts. Vegan or vegetarian? Swap the meat for seasoned lentils, crumbled tofu, or extra beans, and use plant-based cheese.
Step-by-Step Assembly & Freezing for Success
The process of making freezer burritos is straightforward, but a few key techniques can ensure they freeze beautifully and reheat perfectly every time.
Preparing Your Fillings
Begin by preparing all your fillings. Brown your ground meat with your chosen seasonings, ensuring it's fully cooked and flavorful. If adding enchilada sauce and Greek yogurt, stir them in until well combined and heated through. Cook any vegetables you plan to include, and have your refried beans and shredded cheese ready. Allow all cooked fillings to cool slightly before assembling. This helps prevent condensation inside the burrito wrapper, which can lead to sogginess.
The Art of Rolling
Achieving a tight, secure roll is crucial for freezer burritos. Start by laying a tortilla flat. Spread a thin, even layer of refried beans across the center, leaving about an inch clear around the edges. This acts as a delicious glue. Next, spoon your meat mixture down the center, followed by a sprinkle of cheese. Don't overfill! Overstuffed burritos are harder to roll and more prone to bursting. Fold in the sides of the tortilla, then tightly roll it up from the bottom, tucking the filling as you go. The goal is a compact, cylindrical package that won't unravel.
Optimal Freezing & Storage
Once rolled, individual wrapping is key to preventing freezer burn and making them easy to grab. You have several options:
- Foil: Durable and provides excellent protection. Wrap each burrito tightly.
- Parchment Paper + Plastic Wrap: Wrap in parchment first to prevent sticking, then an outer layer of plastic wrap.
- Plastic Wrap: Simple and effective for short-term freezing.
Reheating Your Homemade Delights
One of the greatest joys of homemade freezer burritos is how quickly they transition from icy solid to warm, delicious meal. The reheating method you choose can affect the final texture, so pick based on your preference and available time.
Microwave Method (Quickest)
For speed, the microwave is your best friend. Remove the burrito from its foil or plastic wrap. Wrap it loosely in a paper towel to absorb any moisture. Microwave on high for 2-3 minutes, flipping halfway through, until heated through. If it's still quite cold, microwave for another minute. Be cautious, as the filling can get very hot!
Oven or Toaster Oven Method (Crispier)
For a crispier exterior, the oven or toaster oven is ideal. Preheat your oven to 375°F (190°C). Remove the burrito from plastic wrap (if wrapped in foil, you can leave it). Bake for 30-40 minutes, or until thoroughly heated, turning once halfway through. For an even crispier skin, you can lightly spray the burrito with cooking oil before baking. This method is great for those who enjoy a little crunch.
Pan-Frying Method (Ultimate Crisp)
If you have a few extra minutes and want to achieve that coveted crispy, golden-brown tortilla, pan-frying is the way to go. Thaw the burrito partially in the microwave (about 1-2 minutes). Then, heat a lightly oiled non-stick skillet over medium heat. Place the burrito in the pan and cook for 3-5 minutes per side, or until golden brown and heated through. This method yields a texture remarkably similar to a freshly made burrito from your favorite taqueria.
Once reheated, these delicious burritos are fantastic on their own, but they're also easy to dress up. Serve them with a dollop of sour cream or Greek yogurt, a generous spoonful of fresh salsa or guacamole, a sprinkle of cilantro, or a dash of your favorite hot sauce. They truly taste great any time!
Embrace the Freezer Burrito Revolution
Homemade freezer burritos are more than just a recipe; they're a lifestyle hack, a practical solution for nourishing yourself and your family amidst life's chaos. They represent the ultimate intersection of health, convenience, and economy, allowing you to enjoy delicious, customizable meals without the daily grind of cooking from scratch. By dedicating a small amount of time to meal prepping a batch of these make-ahead marvels, you're investing in weeks of stress-free eating, freeing up your evenings, and keeping your budget in check. So, roll up your sleeves, gather your ingredients, and give these incredible burritos a try. Your future self will undoubtedly thank you for the foresight and the delicious, effortless meals!
